
One of the best things about the beauty industry is how quickly people come up with wonderful products to make your life easier. From salon-quality styling tools at home to super affordable cold-weather skincare, the list is massive.
Among these amazing inventions is adhesive eyeliner, a tiny product that's revolutionizing how women apply their favorite false lashes. In this blog, we'll spill the beans on what adhesive eyeliner is, why you should invest in it, and where you can find the best adhesive eyeliner for your falsies. Let's get started!
Eyelash Glue Vs. Adhesive Eyeliner

Any girl who's ever applied false lashes knows how confusing the process can be the first time you try it. There’s different ways to apply the required adhesive, and both methods have their perks. For instance, traditional lash glue provides an all-day hold that’s tough to beat, especially for women looking to try heavier lashes/heavier bands. Since it’s a glue though, you do have to be a bit more careful during application to avoid running or dripping.
On the flip side, other women have discovered the wonders of adhesive eyeliner, usually in the form of a handy little lash pen they can store in their purse or pocket. True to its name, adhesive eyeliner is a liner laced with a small amount of adhesive, creating an easier and more precise way to apply false lashes in a flash. It goes on just as quickly as eyeliner, and you never have to worry about the adhesive running or dripping. No mess, no fuss! Better still, adhesive eyeliner looks great with natural/invisible band lashes.
Adhesive Eyeliner Vs. Eyelash Glue Ingredients
To give a bit more detail on the differences between adhesive eyeliner versus traditional lash glue, it's important to talk about the ingredients used in each. For instance, some lash glues might contain ingredients like formaldehyde and latex which can cause allergic reactions or irritate your eyes if you run into issues during application. The key is to find a long-lasting, formaldehyde-free and latex-free lash glue that’ll provide the hold you want without the risk of irritation.
On the other hand, adhesive eyeliner's most active ingredient is acrylates copolymer, a non-toxic, paraben-free pressure-sensitive adhesive (or PSA for short). It sounds super complicated, but it's basically what helps form the stickiness needed to hold your lashes in place when pressure is applied. In other words, you get long-lasting, all-day hold for your lashes without the risk of messy, stinky glue or irritants! Best of all, you get all those benefits in a pocket-sized pencil liner that you can carry with you anywhere you go! Again, it all boils down to which method you prefer. They’ll both work the way you want them to, though one is decidedly easier to use than the other.

The Benefits of Adhesive Eyeliner
While we touched on some of the benefits of adhesive eyeliner above, there are certainly more reasons to invest in a lash pen of your own in the near future. After all, it never hurts to simplify your beauty routine anywhere you can!
Easy Application

Right off the bat, the best thing about adhesive eyeliner is how easy it is to use. True to its name, it's just like applying your favorite eyeliner, and whether you're a beginner, an intermediate, or an eyeliner expert, you'll get the hang of things pretty quickly.
A quick shake of the product is all you need to get started. From there, you can swatch the back of your hand to activate the adhesive into the felt tip. Apply the adhesive to your natural lash line and you're ready to start putting on your falsies!

Quick-drying Formula
Another great benefit to eyeliner adhesive and a quality lash pen is how quickly the formula dries compared to traditional lash glues. Most dry in a matter of seconds, whereas lash glue might take longer to dry and have a higher risk of leaving a gunky residue on the lash strip that requires some extra maintenance.
On top of that, falsies tend to wear out faster when you're handling them more often. By saving time on the application process, you're adding length to the life of your lashes!

No Running or Dripping
For anyone new to falsies, it’s sometimes easy to go a little overboard with the lash glue. While practice makes perfect, plenty of women have wished for something a bit easier to keep their lashes in place. In these situations, the quick-drying formula of an adhesive eyeliner lash pen can save you time and headaches from falsie faux pas.
Precise Application
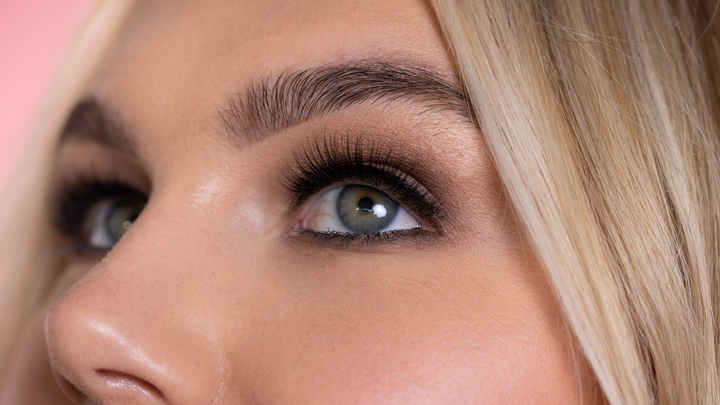
Every girl knows that applying eyeliner is an art form. Get it right, and you create the illusion of a thicker lash base that truly stands out. Mess it up, and your whole look is ruined! Add in a set of false lashes, and it's easy to get nervous, especially if you're a total newbie to the process! It certainly takes practice, but it helps to have the right tools as well.
By combining the precision of an eyeliner pen with the strip eyelash adhesive you'd be looking for in the best eyelash glues, you'll have everything you need to feel confident in your cat eye.

How to Apply False Eyelashes with Adhesive Eyeliner
Whether you're a newbie to falsies or a bonafide expert, it never hurts to have a refresher on how to apply your falsies, especially if you're making the swap from traditional lash glue to an adhesive lash pen. Here's the whole process in four easy steps!
Step 1. Carefully Measure Your Lash Line
As always, your goal is to make sure your false lashes look as natural as possible once everything's said and done. Take some time to properly measure your lash line. After all, you don't want the lashes to be too long on the outer corners of your eye or things will really start to look droopy.
Conversely, lining things up for the inner corner of your eye is equally important. Lashes placed too close to your inner eye can cause problems and become very annoying, very quickly. Once you've measured everything and feel confident, go ahead and move on to the next step.
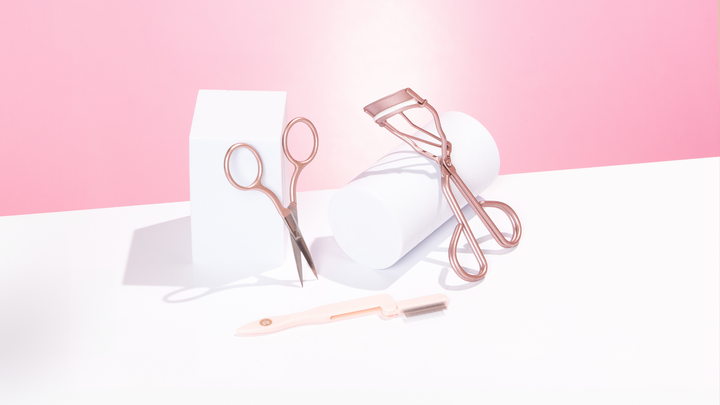
Hint: You can use your favorite mini scissors and trim any excess band from the outer corners of your lashes.
Step 2. Remove Your Falsies from the Tray
Carefully remove your favorite false lashes from the tray. You can use your tweezers, a lash applicator tool you have nearby, or your fingers. Just make sure to be delicate. It's usually better to pretend you're handling a flower.
Pro Tip: Only pick up the lashes from the corner of the lash band, never by the lash hairs themselves. You don't want to damage your falsies before you've even had a chance to wear them!

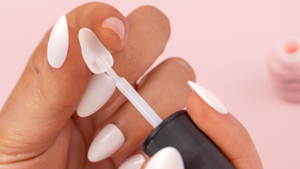
Step 3. Apply Your Adhesive Eyeliner
You're almost ready to put on those falsies! Start by giving your lash pen a shake, then apply the adhesive eyeliner right above your natural lash line. Remember, you have the benefit of a felt-tip pen, so take your time and don't rush. Give yourself a subtle, smokey wing or a cute and confident cat eye. Whatever you want!
Step 4. Fix Your Faux Lashes to Your Lash Line
Now that you have everything in place, go ahead and fix your falsies to the lash liner. Use your fingers or a lash applicator tool to add light pressure. Since you're using quick-dry adhesive, you won't have to wait long at all for it to dry. Congrats! You've leveled up your lash game in record timing!
Oh and in case you were wondering, removing your false lashes to try another pair is just as easy. All it takes is a cotton swab dipped in makeup remover to dissolve the glue along the lash band. You can gently remove the lashes by the band and store them in their case for later. Voila!
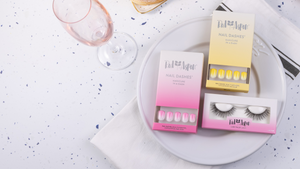
Start Applying Your Falsies in Seconds with Lucy's Lash Pen from Red Aspen


Finding the perfect lash adhesive can be difficult, but it doesn't have to be. That's why Red Aspen set out to create the perfect 2-in-1 product to keep your falsies in place without the fuss!
Vegan, cruelty-free, and with color options ranging from blackest-black to crystal clear and subtle brown, you'll have everything you need to start putting together some killer lash looks in a lot less time. Speak with a Red Aspen Brand Ambassador to learn how you can get your hands on the easy-to-use, pocket-sized Lucy's Lash Pen today!
Written by: Red Aspen Team
Done reading? Return to home.