
Whether you’re a bonafide makeup artist, an everyday user, or put yourself somewhere in the middle, you likely understand the importance of having the right tools for the job. You scrutinize your eyeshadow, and rightfully so! You take a little extra time picking out the perfect face powder, and that’s a no brainer! After all, the right makeup can dramatically improve your overall look, adding allure and boosting your confidence to the clouds.
But what about your makeup brushes? Do you apply the same thought process? Do you carefully compare brands and brush types to find the best fit? The truth is, not everyone does. In fact, most people don’t really understand the importance of choosing the right makeup brushes in the first place. For many, more options translates to “more confusion,” making it tough to pick the perfect makeup essentials or tools to complement their routine. There’s also the question of how to use these makeup brushes the right way, especially if you’re new to the idea of mini makeup sponges, precision highlighters, or other niche items.

Thankfully, there’s an easy way to know which makeup brushes are worth your while. In this blog, we’ll dive into everything you need to know about the best face makeup brushes, eye makeup brushes, and how to use them. There’s a lot to cover here, so grab some coffee, a snack, or settle into your favorite comfy spot and let’s get started!
Why the Right Makeup Brushes are Important for Any Beauty Routine
Before we dive into a whole collection of different makeup brushes, it’s important to talk about why the quality of those brushes matters in the first place. When it comes to makeup and makeup tools, it’s no secret that everyone has their own unique way of doing things. Depending on the day, the event you’re attending, or even who taught you in the first place, you might have a few tried-and-true makeup techniques or brushes you prefer using, rarely branching away from those favorites unless you need to.
That said, not all makeup brushes are created equal, and while price doesn’t always equal quality, there’s an undeniable difference between using the cheapest thing on the market versus something that’s deliberately designed, especially if you’re hoping to replicate the year’s hottest makeup looks and trends.

Your Makeup Will Look Better
The biggest and simplest reason to invest in higher-quality makeup brushes is that you’ll see a noticeable improvement in how your makeup looks. From application to blending, having the right makeup brushes makes everything a whole lot easier, whether you’re putting on the perfect shade of eyeshadow or adding a touch of highlight to your cheekbones.
It’s the same difference you see when swapping out cheaper makeup for something better formulated. You’re blessed with a smoother and more attractive appearance, and that difference can quickly turn heads.
Higher-quality Makeup Brushes are Better for Your Skin
Another not-so-secret reason to consider higher-quality makeup brushes is the difference they can make in your skin’s overall health and appearance. This comes down to the way in which better makeup brushes are designed.
For starters, most high-quality brushes come with softer bristles, making it much more comfortable to apply and blend different products into your skin. As highlighted above, this difference is noticeable, regardless of which products you’re applying. On the flip side, lower quality brushes tend to come with harder, tougher bristles. While these might get the job done, they do so in a way that’s much more abrasive. This increases the risk of damaging your skin, causing inflammation or even premature signs of aging. Not what you wanna hear!
There’s also the factor of hygiene. Because the best makeup brushes are made with materials that don’t readily absorb bacteria or makeup, this makes them much less likely to harbor bacteria. In turn, this makes them much easier to sanitize, which is especially important for people who might share their makeup brushes or use them on multiple clients, like mothers and daughters or makeup artists.

Better Makeup Brushes Will Save You Money in the Long Run
Yet another key difference between different makeup brush brands is durability. When compared side-by-side, it becomes readily apparent which makeup brushes are built to work versus which are built to last.
Materials mean everything, and investing in better-quality makeup brushes made with better materials means you’ll save money in the long run. Put simply, you won’t have to replace them as often. The bristles won’t shed or fray as easily, and the handles will withstand more uses before showing wear. By doing a little extra homework from the get-go, you’ll have a better idea as to what you can reasonably expect out of each brush. This goes especially for brushes you’d use most everyday, like your foundation brush, your eyeshadow brush, or your brow brush.
Face Makeup Brushes Worth Your Fancy
Now that you understand why higher-quality makeup brushes are important, let’s go over which makeup brushes you’d most want in your makeup bag. Brush types are typically split into two categories, face and eyes, so we’ll start with a few of the best face makeup brushes that might pique your interest!

Multitasking Powder Brush
The first makeup brush you’ll want to upgrade or get your hands on is a durable Multitasking Powder Brush. As one of the more important makeup brushes in your arsenal, it’s used for a variety of makeup tasks including applying and blending powder blushes, bronzers, setting powders, finishing powders, highlighters, and contouring products.
In short, it’s the ideal tool for adding the perfect finishing touch to your favorite makeup looks. With Red Aspen’s Multitasking Powder Brush, you’ll have a brush that’s not only comfortable to hold, but versatile as well. Designed with soft, synthetic fibers in a large, rounded, fluffy shape, you’ll have everything you need to expertly apply your favorite bronzer, highlighter, or setting powder. It’s also incredibly easy to use, requiring only a few steps for the best results.

How to Use a Multitasking Powder Brush
- Start by dipping and swirling your powder brush across the powder product, then gently tapping off any excess product.
- Swipe the brush across your face wherever you want to apply blush or powder.
- Use your powder brush to touch up any shiny spots on your T-zone (forehead, nose, and chin) throughout the day.
Angled Contour & Blush Brush
When you’re looking to enjoy maximum control and color payoff of your boldest, most dramatic looks, an Angled Contour & Blush Brush is often your best choice. Designed to mimic your fingertips, these makeup brushes tend to be compact, often made with feathery-soft synthetic fibers woven in a fluffy, angled shape for precise application.
This makes them especially effective for applying your favorite powder blush, bronzer, or contour in a single sweep. Best of all, they’re exceptionally easy to use, requiring little to no previous experience to work them into your existing beauty routine.

How to Use an Angled Contour & Blush Brush
- Start by swirling the brush into your favorite contour, blush, bronzer, or any other powder.
- Gently tap off any excess product.
- Blush application is a tad different, meaning you’ll want to begin by gently sweeping color across the apples of your cheeks and blending out toward your hairline.
- To apply bronzer, blend color into the hollows of your cheeks for a chic, sculpted effect. No expert makeup skills required!
Precision Highlighter and Contour Brush
For those times where you want to deliver high shine and bold color to your everyday looks, a Precision Highlighter & Contour Brush will be your best bet. Made with soft, synthetic fibers in a long, tapered, and domed shape, this design helps to deliver the perfect amount of highlighter and contour to your complexion every time. The end result is a radiant, lit-from-within glow that’ll have you beaming.
Like many brushes on this list, this makeup brush is also relatively easy to use. It’s typically used with powder highlight, blush, bronzer, or contour, and you don’t have to be an expert to work it into your everyday routine. That said, there are a few tips you can use for better results. 
How to Use a Precision Highlighter and Contour Brush
For Contouring
- For contouring, load up the tips of the brush with your preferred powder highlighter, blush, or bronzer. Given its smaller size, this method makes the most sense.
- Lightly work the product into the hollow of your cheeks, then lightly brush upwards a little higher than the hollow of the cheeks to emphasize the cheekbones a little bit more.
- From there, work the brush lightly across your forehead to balance out the contour between the top and bottom of your face.
- Finish things up by gently working product along the bottom of your jawline and evenly blending into your neck.
For Highlighting
- For highlighting, start by working the highlighter across the top of your cheekbones until you reach your desired effect.
- Repeat this process along the bridge and top of your nose, under your brow right along the brow bone, or on the Cupid’s bow of your lips, basically anywhere you’d like a very thin, tiny layer of shimmery highlighter.
- Lastly, use the edge of the bristles for precise, even application. That’s all there is to it!
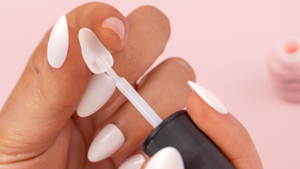
Liquid Foundation Brush
There is nothing more frustrating than streaks or patchiness in your liquid foundation. While it can happen to the best of us, it tends to happen more often with lower-quality foundation or makeup brushes.
That said, you’ll absolutely want to get your hands on a higher-quality Liquid Foundation Brush ASAP. While there are lots to choose from, you’ll quickly notice that the best liquid foundation brushes come with soft, densely-packed synthetic fibers in a slightly rounded and slanted shape. Thanks to this design, you’ll enjoy expert blending and contouring of your favorite skin tint, cream, or cream contour. A total win-win!
Because they’re a common part of most womens’ makeup routines, liquid foundation brushes are also relatively easy to use. The steps don’t change drastically from one brush to the other, but there are some tips you can use for better results.

How to Use a Liquid Foundation Brush
- Begin by putting some liquid foundation or cream foundation on the back of your hand.
- Using your fingers or the liquid foundation brush, dab the foundation all over your T-zone, aka your forehead, nose, and chin.
- Next, dab the foundation onto your cheeks. Note that you can also apply foundation to other parts of your face that might need extra coverage, such as under your eyes or around your lips.
- Use small, circular motions to spread the foundation. Ideally, you want the foundation to evenly coat your face, from your hairline to your jawline. Practice this as needed, but you should get it down quickly.
- After blending, you can always go back and add more foundation to any areas that might need more coverage. Use the sides of the brush to cover those hard-to-reach places, like the corner of your eyes and above your lips. Remember, you only want to apply as much foundation as you need, else you risk the foundation looking cakey. Yikes!
Buffing Brush
When doing your makeup, it’s no secret that you want seamless, all-over buffing and blending of your favorite skin tints and primers. The results speak for themselves, and it’s generally one of the easier things to learn to do well, even for beginners.
Naturally, this makes finding the right buffing brush a top priority. Thankfully, you won’t have to look far, as Red Aspen’s Buffing Brush has everything you need right out of the box. Made with soft, densely-packed synthetic fibers in a flat, kabuki-style shape, it's the ideal makeup brush for applying a smooth, even layer of foundation or powder. Better still, it fits effortlessly into your existing beauty routine, functioning just the way you need it to even if you’re still learning how to blend like a pro.

How to Use a Buffing Brush
- Using a buffing brush is pretty standard, and for the best results, dip your brush into the product and apply using circular, buffing motions.
- Start from the center of the face and work outward to maintain even coverage.That’s all there is to it!
Makeup Sponge
Makeup sponges have been around since the 1920s, so there’s plenty of reasons to love them. For starters, they’re amazing for blending, providing lots of coverage wherever you need it. On top of that, they can be used wet or dry, though there are some caveats to using them wet to ensure everything looks as it should.
That said, if you’re looking to apply and blend different skin tints, creams, or setting powders, a good makeup sponge is an absolute godsend, and it will leave you with a smooth, poreless finish that you’ll quickly fall in love with.
Thanks to the Makeup Sponge from Red Aspen, you’ll have everything you need in a sponge, plus a few extra perks. It’s easy to hold with a versatile teardrop shape, and it’s a cinch to use. Here’s what that process looks like at a glance.

How to Use a Makeup Sponge
- Important: If using the sponge wet, be sure to squeeze out any excess water before using it. You don’t want to muddy or splotch the makeup you just put on or absorb it back into the sponge.
- Use the rounded end for larger areas of the face when applying liquid foundation, a bronzer, or a cream blush. Blot any excess product off as needed, leaving just the right amount of product on the skin.
- Use the tip of the makeup sponge to blend hard-to-reach spaces like the inner corner of the eyes, around your nose, and underneath your eyeliner to enhance sharpness. Additionally, you can use the tip of the makeup sponge for setting powder in the T-zone (aka your forehead, nose, and chin).
Pro Tip: If applying setting powders or any type of powder, a dry makeup sponge will generally work better. Wet can muddy or splotch the makeup and absorb, so they must be dry to sit on top of the skin.

Mini Makeup Sponge
Makeup sponges also come in smaller sizes, and when you need ultra-precise application of your preferred concealer or powder, a mini makeup sponge will quickly become your MVP.
You won’t have to look far for a suitable sponge either, as the Mini Makeup Sponge from Red Aspen has everything you need for a flawless finish on your favorite makeup looks! Thanks to its small but mighty teardrop design, it’s the perfect tool for those smaller areas like the under-eyes or around your nose.
At the end of the day, it’s about having the right tool for the job, and a girl can never have too many options. After all, you want to be prepared for a variety of looks. Here are some tips you can keep in mind to get the most out of your mini makeup sponge. 
How to Use a Mini Makeup Sponge
- Use wet or dry with liquids, creams, or powders (see below for additional notes on powders).
- If using wet, be sure to squeeze out any excess water before using.
- For the best results, use the tip of the makeup sponge to blend hard-to-reach spaces like the inner corner of the eyes, around your nose, and underneath your eyeliner to enhance sharpness. Use the tip of the makeup sponge for setting powder in the T-zone (aka your forehead, nose, and chin).
Pro Tip: If applying setting powders or any type of powder, a dry makeup sponge will generally work better. Wet can muddy or splotch the makeup and absorb, so they must be dry to sit on top of the skin.
Precision Makeup Sponge
When you’re looking to play all your best angles and enhance just about any look, a Precision Makeup Sponge can work some real wonders! Designed with a flat side to hug the surface of your face for flawless blending and a point for precise makeup application, it’s the ultimate tool for smooth, seamless, and buildable coverage of your favorite liquid, cream, or powder foundation.
Like other makeup sponges, it’s also super easy to add to your existing beauty routine. The same rules apply weather you’re using a Precision Makeup Sponge or a larger, standard size, and these are we follows:

- Remember that this sponge can be used wet or dry.
- If applying setting powders or any type of powder, ensure that the sponge is dry. Wet will muddy or splotch the makeup and absorb, so they must be dry to sit on top of the skin.
- If using wet, be sure to squeeze out any excess water before using.
- Use the rounded sides for larger areas of the face that you’d usually cover when applying liquid foundation, a bronzer, or a cream blush. Blot any excess product off as needed, leaving just the right amount of product on the skin.
- Use the tip of the makeup sponge to blend hard-to-reach spaces like the inner corner of the eyes, around your nose, and underneath your eyeliner to enhance sharpness. Additionally, you can use the tip of the makeup sponge for setting powder in the T-zone (forehead, nose, and chin).
Fan Highlighter Brush
We’ve all seen celebrity photos where they seem to have that perfect kiss of powder highlighter from every angle. While your first thought might be that this is something only reserved for the pros, think again! With a high-quality Fan Highlighter Brush, you can achieve this look just as easily as your beauty idols.
As one of the more common makeup tools, fan brushes are ideal for those times where you need a light dusting of product, and they were designed for this purpose. After all, the goal is for your skin to lightly glisten, not look as if you loaded up your cheeks with glitter (unless you’re headed to an amazing music festival, of course).
That said, you won’t have to look far for a quality highlighting tool. With the Fan Highlighter Brush from Red Aspen, you’ll have everything you need for a radiant, all-over glow. Better still, the brush is made with soft, synthetic fibers, guaranteeing even application of your preferred powder highlighter every time.

How to Use a Fan Highlighter Brush
- Hold your fan brush flat and flush against your highlighter, pushing down gently to coat the sides and tip of the bristles. Remember, you want to use the side of the brush head here, not just the tip of the bristles.
- Gently tap the brush handle with your pointer finger a few times to get rid of any excess powder. You don’t wanna overload your face with product.
- Carefully sweep the brush upward along the tops of your cheekbones towards your temple, laying the pigment in a light swiping motion to create an almost airbrushed effect.
- Continue dusting the powder across your cheekbones until you reach your desired effect.
- Repeat the process on the edge of your nose, the edge of your brow right at your brow bone, or above the lips, basically anywhere you’d like a very thin, tiny layer of shimmery highlighter.
- Use the edge of the bristles for precise, even application.
Eye Makeup Brushes Worth a Second Look
Every girl understands the importance of well-applied eye makeup. It plays a crucial role in the impact of your overall look, and it’s generally one of the first things you learn to do as a budding makeup artist. Your eyes are considered the focal point of your face, and with the right techniques, you can enhance their natural beauty quite effortlessly. You can use different eyeshadows, eyeliners, and false lashes to add depth or dimension to your eyes, making them appear larger or more defined in the process.

Moreover, the right eye makeup can help showcase your creativity, giving you the freedom to explore new and exciting ways to experiment with different color combinations, techniques, and textures to create a variety of stunning and eye-catching designs, whether you’re looking to match a specific theme or dressing up for a special occasion. The possibilities are endless!
That said, your best eye makeup looks are far more achievable when you have the right tools, making it all the more important to invest in the best eye makeup brushes from the get-go. As you start building your collection, here are a few eye makeup brushes worth a second look.
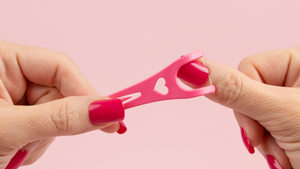
Spoolie Brow Brush
Eyebrows are notorious for being one of the most tedious and frustrating steps in the makeup process. They’re meant to frame your face after all, so it’s understandable to stress a little in the struggle to keep everything symmetrical. It takes a little trial and error to get things right, and that’s OK!
That said, every girl knows that rush of excitement when things just seem to click into place. If you’ve ever dreamed of having brows that wow, you know it takes the right technique and tools to ensure you can replicate your best results day after day. Thankfully, achieving your best brow looks is easier than you think. With the Spoolie Brow Brush from Red Aspen, you’ll have the ideal makeup tool to brush your brows to perfection. Designed with a spoolie on one end and a flat spatula on the other, it’s super simple to use, no matter your experience level with sculpting eyebrows.
Not only that, but it makes adding Eyebrow Gel to your beauty routine a whole lot easier as well. Whether you choose to use the brow gel by itself or as a last step in your beauty routine, you’ll have everything you need for beautiful results. If you have full brows, you can use the brow gel to tame and shape them for a more laminated look. However, if you like to fill in your brows, you can create the shape, add your color (we highly recommend the Red Aspen Averie's Brow Pencil), then set your brows with the gel! It’s that easy!

How to Use a Spoolie Brow Brush
- Pick up a small amount of product using a spoolie or the spatula end of the Spoolie Brow Brush.
- Using the top of the lid or back of your hand, work the gel evenly onto the spoolie.
- Brush gel through eyebrows in an upward motion. Sculpt eyebrows to desired shape.
- Remove Eyebrow Gel with warm soapy water, or makeup remover.
Pro Tips for the Spoolie Brow Brush: There will be times when you want to decide between a bolder look or something that looks more natural. Remember, it’s all in the way you shape your brows. If you’re going for a look that’s more natural, then you’ll want to brush the brow gel into your brows with light, subtle strokes.
On the other hand, if you’re going for something more bold and dramatic, or if you have a lot of natural brow hair anyway, you can achieve this by adding in some product and brushing your brow hairs in an upward direction. From there, just flatten them against your brow with the spatula end of the Spoolie Brush. This will also make your brows look more full and laminated.
Angled Brow Brush
All of us are unique in our own way, and that includes our face shape, facial features, and even our brow characteristics. With that in mind, you need a brush that can create subtle adjustments and enhancements on the fly, whether that’s elongating your brows to create a more balanced appearance or softening the angles for a more gentle arch.
With the Angled Brow Brush from Red Aspen, you’ll have the ideal tool to help you shape and sharpen your best-ever brows with minimal effort, regardless of your face shape. Designed with synthetic fibers arranged in a chiseled, flat, and angled shape, it’s best used with powders, creams, pomades, or liquids, making it a versatile powerhouse. Best of all, using an Angled Brow Brush is as simple as it gets!

How to Use an Angled Brow Brush
- For perfectly groomed brows, use the angled brush end with light strokes to precisely apply your preferred product (powder or gel).
- Shape and define your brows according to your face shape, and voila! Beautifully sculpted brows in seconds!
Eyeliner Brush
For those times where you need to craft the perfect tight line, wing, or bold cat eye, a well-made Eyeliner Brush is quickly going to become your very best friend. Made with soft, synthetic fibers in a flat, dense, fine-edged shape, the best eyeliner brushes guarantee precise lines and controlled smudging with all of your favorite powder and cream eyeliners.
They’re also super simple to use, requiring only a few steps to craft a variety of bold or subtle looks depending on the occasion.

How to Use an Eyeliner Brush
- Carefully apply your preferred powder or cream eyeshadow to both sides of the brush.
- Place the longer end of the Eyeliner Brush in the inner corner of your lash line then pass the brush along your lash line toward the outer corner to make a single straight line. Fill in spots as necessary.
- To create a wing, place the longer corner of the Eyeliner Brush on the outer corner of your eye, drag it out, then place the longer edge to the outside wing area and drag back in to connect it to the eyeliner. Fill in the wing afterward.
Eyeshadow Smudge Brush
Sophisticated. Edgy. Rebellious. Glamorous: these are just a few of the words used to describe the classic, sultry “smokey eye” look, and whether it’s for a night on the town or some subtle daytime drama, a smokey eye instills superior confidence to any girl who can pull it off.
For those of us wanting to rock this look for ourselves, it’s understood that you need not only a little practice, but the proper tools and technique as well. Enter the Eyeshadow Smudge Brush from Red Aspen. With its compact frame and densely-packed synthetic fibers, precision control for smudging has never been easier. Not only that, but you’ll have the ideal makeup tool for applying inner corner highlights and flawless color on the fly.

How to Use an Eyeshadow Smudge Brush
- Sweep the Eyeshadow Smudge Brush across eye shadow on the lid, in the inner and outer corners, and at the crease to blend and diffuse to perfection.
- Use the tapered end of the Eyeshadow Smudge Brush to soften eyeliner by running along the entire lash line, including top and bottom, for a smokey effect that’s sure to turn heads.
Eyeshadow Blending Brush
Elevating your eyeshadow game also requires a few more tools, namely a quality Eyeshadow Blending Brush. Designed to help you blend and diffuse eyeshadow into the crease and contour of your eyelids, the best eyeshadow brushes are typically large with fluffy, synthetic fibers in a tapered shape. If done correctly, you end up with a nice, cohesive eyeshadow look you can be proud of.
If you’re new to eyeshadow blending brushes, you needn’t worry either, as they’re generally easy to add to your existing beauty routine. Using one is simple, and it only takes a few minutes to blend your eyeshadow the right way. Here’s what that process looks like on a step-by-step basis.

How to Use an Eyeshadow Blending Brush
- Start by sweeping the eyeshadow blending brush in a windshield-wiper-like motion along the creases to soften the edges.
- For the best results, you want to try and spend a few minutes blending eyeshadow to completely remove any noticeable lines between the two colors.
- As an added tip, avoid getting dark colors on the innermost part of your eyelid, closest to your nose. This can make your eyes appear smaller and more closed off, which you don’t want.
Eyeshadow Crease Brush
Yet another important brush for any eye makeup routine is the Eyeshadow Crease Brush. Applying the perfect amount of eyeshadow color to your lids takes practice, but it’s infinitely easier when you have the right makeup tools.
Comfortable and versatile with a tapered point for precision blending, the Eyeshadow Crease Brush from Red Aspen is one of the easiest ways to simplify your eyeshadow routine. You can add depth and definition with minimal effort, and creating the ultimate cut-crease looks takes no time at all!

- Apply some eyeshadow product to your makeup brush, then gently tap off any excess product.
- Place the Eyeshadow Crease Brush on the outer corner of your eye, into the crease of your eye, aka the area just below where you feel the bone beneath the top of your eyelid.
- Use gentle windshield wiper motions to apply your eyeshadow.
- Repeat for both eyes for a flawless look, then pat yourself on the back! You look gorgeous!
Medium Eyeshadow Lid Brush
Speaking of flawless, every girl can appreciate exceptional, evenly distributed color of their favorite eyeshadow. It’s Makeup 101, and when you have the right tools for the job, it’s a lot less stressful worrying about whether your eyeshadow looks perfectly blended or positively frightening.
With the Medium Eyeshadow Lid Brush from Red Aspen, you have the ideal makeup tool for touch-ups and on-the-go spot coverage. Compact, easy to use, and ultra flat with synthetic fibers for precision application, it’ll quickly become one of your favorite additions to your makeup bag.

How to Use a Medium Eyeshadow Lid Brush
- Load up the eyeshadow brush with your preferred eyeshadow of choice, whether that’s a powder or a liquid.
- Carefully shake off any excess product as needed.
- Lightly sweep your eyeshadow over the eyelid for flawless, evenly distributed color. That’s all there is to it!
Large Eyeshadow Brush
Mastering your best eyeshadow looks also means learning how to pack the perfect amount of contour onto your lids. As you work to create a variety of eye-catching looks, you owe it to yourself to invest in a Large Eyeshadow Brush from Red Aspen.
Large and versatile with softer synthetic fibers, it’s the perfect eyeshadow makeup brush for those times where you need to apply a specific amount of powder color to your entire lid.

How to Use a Large Eyeshadow Brush
- Apply your preferred powder eyeshadow to the Eyeshadow Brush by gently and evenly patting the brush over your entire lid, starting from the inner corner of your eye (just above your tear duct) and working your way outwards.
- For a softer look, use a sweeping motion (instead of patting the brush) with quick, gentle strokes. Don’t forget to congratulate yourself on a job well done!
Eyeshadow Detail Brush
Eyeshadow can be fun, but it can also be a little tricky, especially when you’re trying things with your eyeshadow that are super new to you. That said, there will come times where you need a little extra precision with your eyeshadow application and detailing. There’s a great tool for that, and it just so happens to be the last brush on our list!
With the Eyeshadow Detail Brush from Red Aspen, you’ll have the ideal makeup brush for applying powder to smaller areas and highlights to your brow bone. The brush is short and dense with rounded synthetic fibers, so it’s the obvious choice for precision application and detailing of powder to smaller areas and highlights to your brow bone.
While eyeshadow can be tricky to master, this makeup brush isn’t. There’s only a few steps to remember for the best results.

How to Use an Eyeshadow Detail Brush
- Start by using the Eyeshadow Detail Brush to brighten up the inner corners of your eyes by pressing a light, shimmery shadow next to the tear duct.
- As an added bonus, you can create definition and darken your crease by placing concentrated color on the eye’s outer-V.
- After your preferred color is applied, blend along the crease of your eye with soft circular strokes. That’s all there is to it!
The Benefits of Red Aspen Makeup Brushes
At Red Aspen, we recognize that beauty starts from within, and whether applying Red Aspen products at home or on-the-go, our products are guaranteed to be fun, playful, and intuitive. To that end, every Red Aspen product is grounded in our core values and mission - to uplift, empower, and enhance the beauty of all women.
As we continue to create new makeup products and tools, it’s important to highlight some of the key benefits that set our products apart from our competitors. Here are some not-so-subtle reasons you should be adding Red Aspen Makeup Brushes to your everyday beauty routine.

Designed with a Purpose
Whether it's a new palette of eyeshadow or a fresh take on the classic Lash Curler, all Red Aspen products are designed for both efficiency and versatility. Our makeup brushes are no exception, and we pride ourselves on creating makeup tools that’ll save you time, money, and
Competitively Priced
At the end of the day, customers expect the products they’re interested in to be competitively priced. Fail to hit the target number, and you risk losing customers to a rival. At Red Aspen, we’re proud to say that all of our products, from our beloved press-on nails to our iconic false lashes, makeup, skincare, and tanning products are competitively priced. We’ve done the same for every makeup brush we’ve discussed above, and we’ll continue that trend for every product we design in the future.
Ultimately, we believe in creating innovative products for the everyday woman, and we understand the importance of beauty products that are both high quality and affordable. We’ll never sacrifice one for the other, nor should you!
Easy to Use
As a leading beauty and cosmetics company, Red Aspen is constantly looking for new ways to create products that everyday women can use and understand comfortably, regardless of their experience level. After all, makeup is supposed to be fun!
We feel we’ve continued that promise with this makeup brush collection, and you can count on that same commitment well into the future. We sincerely value your feedback, and we promise to never stop learning!
Upgrade Your Everyday Beauty Routine with Red Aspen Makeup Brushes

So, there you have it, 18 makeup brushes worth your investment. It sure was a lot to cover, but we got through it, and we hope you learned a thing or two in the process. If you found yourself curious to learn more about Red Aspen makeup brushes or just want to see what else our company has to offer, we’d love to hear from you!
Reach out to a Red Aspen Brand Ambassador today to learn how you can upgrade your everyday beauty routine with Red Aspen makeup brushes!
Written by: Kelly Ann Asker
Done reading? Return to home.