
For those blessed with tannable skin, getting a flawless tan is as easy as stepping out into the sun. But for the pale girlies, stepping out into the sun could mean weeks of sunburned agony. No matter how much sunscreen you slather on, you seem to skip over tan and go straight to tomato red.
Getting salon fake tans can seem like a great alternative to attempting to tan on the beach or at the pool, because you can lay in a tanning bed for 5 minutes and almost always leave without a burn. It seems almost consequence free! That is, until you’re visiting the tanning booth once a week for the rest of your life and the negative side effects slowly pile up.
The truth is, being exposed to UltraViolet Rays - whether it be from the sun or from a tanning bed - can severely damage your skin over time and lead to skin cancer. Unfortunately, there are more cons than pros when it comes to extended and unprotected exposure to these rays, and having easily tanned skin doesn’t make you immune to these cons either.
What are UltraViolet Rays?
UltraViolet (UV) Rays are a type of radiation that come naturally from the sun, and can be artificially replicated in tanning booths. This type of radiation is okay in small doses while using sunscreen, but laying in the sun for hours with no protection - or worse, with tanning oil - can severely damage your skin both short term and long term.
If you have never experienced a bad sunburn, count yourself lucky. This is one of the short-term forms of skin damage you can experience by not protecting your skin. Sunburns happen because your skin’s protective pigment, called melanin, is unable to protect the skin from the amount of UV Rays it’s being exposed to.
Sunburns cause your skin to turn red and can range from a slight flush, to a full blistering burn. Ouch! That’s right, just like a burn from a stove, sunburns can cause your skin to blister, burst, and peel. Not to mention the extreme pain they can cause as well. Your skin becomes so burnt and sensitive, it can hurt to the touch.
A first-degree sunburn only affects the outer layer of the skin and typically lasts 3-5 days. A second-degree sunburn affects the first layer of the skin, along with the underlying layers, and can last up to three weeks. Third-degree sunburns, while not super common, can last for months and require medical attention.
Despite the name, Sunburns aren’t just sun-related - you can also receive a sunburn in a tanning bed. If you think that sounds unpleasant, wait until you hear about the long-term effects for overexposure to UV Rays.

UV Rays and Skin Cancer
Just because you aren’t sunburn-prone, doesn’t mean you’re immune to the effects of UV Rays. Avid sunbathers who use little to no sun protection are at a high risk of developing skin cancer too.
Skin cancer is caused by intense exposure and long-term exposure to UV radiation and can be caused not only by the sun, but by tanning beds as well. Skin Cancer is the most common type of cancer, and 1-in-5 Americans will be diagnosed with some form of it by the time they are 70-years-old.
It’s a common misconception that tanning beds are safer than laying in the sun because they emit different levels of light, but that is not the case. Tanning booths still emit UV Rays, but at a closer proximity to your skin, so they can still cause sunburns, premature aging, and skin cancer.
While using sunscreen decreases your risk of developing skin cancer and skin precancers, it doesn't guarantee you’ll never get skin cancer. The best way to prevent skin cancer is by limited long term sun exposure - such as tanning - and to wear sunscreen everyday.

Better Tanning Alternatives
We understand the desire for gorgeous glowing, bronzed skin - and we don’t want you to have to give up your lovely tan! However, there are healthier alternatives that should be considered, instead of sunbathing and using tanning beds.
Our #1 favorite tanning product is our Red Aspen Tanning Drops. Made with good for you ingredients like Hyaluronic Acid to hydrate and plump skin and Vitamin E to even the appearance of skin tone while blurring imperfections, Tanning Drops make a great alternative to UV Tanning options.
To use Tanning Drops, simply add 2-3 drops - or more, depending on how deep you want your tan - to your favorite moisturizer or foundation. Rub the mixture into your skin, making sure to cover every surface and to blend well!

Now, carry about your day, making sure to avoid perspiration or showering, as the Tanning Drops take 6-8 hours to develop. The great thing? Tanning Drops build over time so your tan will get deeper and deeping as you continue to use the drops! This means you don’t have to go from pale to deeply bronzed overnight, like you do with a spray tan.
For a complete guide to using Red Aspen Tanning Drops, visit our bog “How to Give Your Skin a Happy Healthy Glow with Red Aspen Tanning Drops”!
Now, we know what you’re thinking: “But I hate that fake tan smell!” Trust us - we hate it too! That’s why Red Aspen Tanning Drops are infused with Rose Essential Oil. After you're done, you won’t be left with that classic fake tan scent. Instead, you’ll give off a subtle, floral scent that’s not too overpowering, but just enough to mask that fake tan odor.

What About Spray Tans?
It’s true that spray tans are a lot better for your skin than tanning beds and sunbathing, but there are many drawbacks that make spray tans not worth the hassle.
For starters, you can’t spray tan at your own convenience. Planned a last minute vacation and are in desperate need of a tan? If the tanning salon doesn’t have an opening - then you’re left to fend for yourself.
One thing every spray tanner knows is how expensive it is to tan regularly. If you’re adding on all the bells and whistles - which are basically essential if you don't want to end up orange - you can easily drop $50 for one tan. That’s crazy! On top of that, to maintain a spray tan you must revisit the salon every 7-12 days. All those tans start to add up… Just think - you could be spending that money on a nice vacay!
After you’ve managed to book your appointment and shell out the money owed, comes the most dreaded part of the tan: The 8-hour period before you can shower.
When you first step out of the spray tan booth, you’re looking rough - it’s just inevitable. Wearing baggy clothes to not ruin your tan, looking super dark, and stinking like a fake tan! You almost want to hide inside the rest of the day.
Every moment from when you step out of the booth is spent avoiding anything that could smear your tan and end up stained. Car interior? Put a towel down. Bed sheets? Towel. Couch? Do you even dare to risk it?
Eight hours after your tan, you’re good to shower off that top layer of tan - but that doesn’t mean you’re clear of fake tan stink or staining!
All in all, spray tans are not worth the hassle, especially when there are quicker, easier, cheaper, and more convenient options available.

Using Red Aspen Tanning Tools for an Easier Application
If it’s your first time using Self Tanner at home, you may be a little intimidated by the process. After all, you don’t want to end up with a splotchy and uneven tan. That’s why Red Aspen has a line of tanning tools to help you get a flawless tan without the hassle.
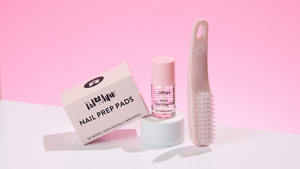
Kabuki Brush
A Kabuki Brush is perfect for blending out Tanning Drops in those hard to blend areas, like your wrists, ankles, and hands!
To use the Kabuki Brush, simply sweep across your skin in circular motions to blend in the moisturizer and Tanning Drop mixture. To clean the brush, just rinse with warm water and air dry.
No more splotchy, over processed areas. Instead, your tan will be smooth and streak free - what more could you want?!

Save You Skin with Red Aspen Self Tanner
Beauty doesn’t have to be pain. Skip sunbathing and tanning beds, save yourself the pain of sunburns, and lessen your risk of skin cancer with one easy change - start using Red Aspen’s Tanning Drops.
You shouldn’t sacrifice your health just to look good - and you don’t have to! To shop Red Aspen Tanning products, visit redaspenlove.com.

Written by: Kelly Ann Asker
Done reading? Return to home.