When it comes time to level up your look, fake nails can be a total game-changer. Not only are they super easy to use, but they look great and feel great too!
That being said, removing those pretty press-ons can sometimes be a total pain. Botch the process, and you run the risk of ruining your natural nails. Yikes! In this blog, we'll walk you through all the proper steps to removing fake nails the right way. Let's get started!
Why Is Nail Glue So Tough to Remove?

Any girl who's familiar with fake nails knows the love-and-hate relationship with nail glue. Yes, we love it when the glue does its job, but we also hate it once it's time for it to come off.
There's a reason it's so tough to remove, too. Your typical press-on nail glue contains ingredients known as cyanoacrylates, which are a family of strong, fast-acting adhesives that have a variety of uses. Cyanoacrylate glue is made from Ethyl cyanoacrylate and, when cured, it takes the shape of a polymer (think plastic) resin that bonds super strong and super quick. Because it works so well, it's just as difficult to remove by design.
Different Types of Nail Glue & Nail Adhesive Applicators
Finding the perfect nail glue for your press-ons can also be a tad confusing at first. Google brings up a ton of results, and it's tough to know which is the right fit for your nails at a glance. That being said, the best nail glue options are usually purchased and applied in one of two ways.
Nail Glue Squeeze Tube

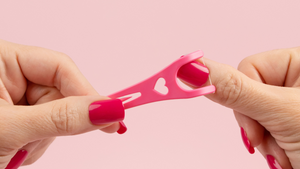
One of the most basic ways to apply nail glue is through the use of a squeeze tube. These typically come packaged with a set of fake nails, and the process is as easy as placing the tip to your natural nail, squeezing the tube, and applying the glue as evenly as possible.
However, it's important to note that a squeeze tube may be more of a gamble if you aren’t used to them. You'll get plenty of glue out of it, but you might not always get the amount you want or need at a given moment. In fact, it's much easier to squeeze a little too much at a time, leaving you to clean up the remaining glue as best you can.
Brush-on Nail Glue

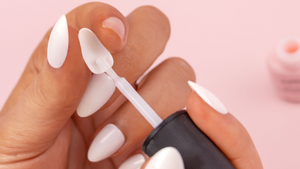
Another way to apply nail glue is through the use of a brush-on tool. This tends to be a favorite for most women, as the brush makes things quicker and much more even overall. You can cover the whole nail in half the time. More importantly, it becomes much easier to control how much glue you use at once.
Rather than dealing with a ton of excess glue, you can spend that time admiring the amazing work you've done so far. Not only that, but you'll have a much better picture of how long it might take you to repeat the process once you're ready to change up the colors or patterns of your press-ons.
Nail Adhesive Strips

Options are everything, and for women who might still be on the fence about the semi-permanent nature of press-ons and super glue, nail adhesive strips provide a perfect temporary solution. Applied right to the base of your natural nail, they act like sticky guideposts for your press-ons. All you have to do is select the size that best fits your natural nail, peel off the backing, line things up, and voila! A non-damaging, easy-to-apply base for your fake nails.
That being said, it's important to remember that adhesive strips are still a shorter-term option. While they'll last for a few days (typically between 1-5), they won't have the same sticking power as traditional nail glue. This means you'll need to be much more careful with your nails than if you applied some stronger adhesive.
Removing Nail Glue Made Easy
It might be tempting to assume that removing nail glue is a messy and difficult process, especially if you're new to glued-on fake nails in general. That couldn't be farther from the truth! In fact, it's so easy that you'll likely be changing up your preferred styles in no time! Here's a simple 5-step guide to removing excess nail glue in a flash.
Step 1: Soak Your Nails in Warm Soapy Water
The first step to properly removing nail glue is to soak your hands in warm soapy water. This will help to loosen up the adhesive, making it much easier to remove. Ten minutes is usually enough, though you can always leave them in for a little extra time as needed. Applying some nourishing cuticle oil to your nails prior to soaking is a benefit here, as is adding the cuticle oil to your warm, soapy water mixture.
Pop on your favorite show, listen to some music, whatever helps you to sit still and relax while the water works its way into the glue. Either way, the process doesn't take too long once you get things going.
Step 2: Add an Acetone Soak
While a gentle soak in warm soapy water should help to dissolve most of the glue on your nails, it's a good idea to soak your nails in some acetone as well. It's a common ingredient in nail polish remover and, bottom line, it's the most effective way to remove the majority of the remaining glue from your nails.
That being said, acetone isn't particularly gentle on your skin. In fact, it'll likely dry things out quite a bit. You'll want to keep some moisturizer on hand for later, or make sure to apply our Hand Cream and/or use some Cuticle Oil after.
Step 3: Gently Peel Off Your Fake Nails
Once your hands and nails have been properly soaked, you can start gently removing your fake nails. A nail dash removal tool is especially helpful here, as the wooden stick that’s included with a set of nail dashes can gently lift the fake nails with the right amount of pressure.

Remember, the key here is to use light pressure and lift from the side. You never want to force removal or you risk damaging your natural nail. If this process is difficult, it's best to repeat step one for a few extra minutes.
Step 4: Use a Nail Buffer or Cuticle Pusher to Remove Excess Glue
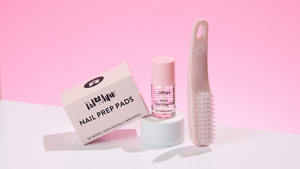
When peeling off your fake nails, there's a good chance there might be some residual glue still left on the nail surface. This is a great time to break out your favorite nail buffer or nail file and get to work restoring your natural nails.

You should be able to get most of the glue off this way, though you can also perform some extra cuticle cleanup with a cuticle pusher. Whatever you decide to use, it's good to keep your favorite nail care accessories close at hand, as you never know when you'll need to do some extra scraping, trimming, or moisturizing.
Step 5: Nourish Your Nails with Cuticle Oil

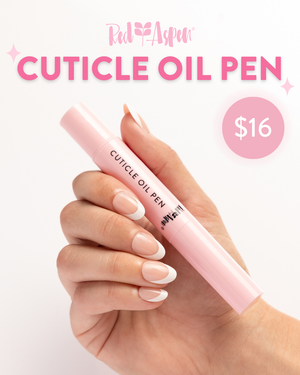
To help speed up the nail glue removal process, another great idea is to apply some cuticle oil to your nails. Packed with ultra-hydrating ingredients like argan oil, jojoba oil, and Vitamin E, Red Aspen's Cuticle Oil Pen can do wonders for nail health and the skin around it, nourishing and restoring your nail beds in a flash. In other words, your nails will appear shinier and glossier than ever before!
Revamp Your Nail Care Routine with Red Aspen

No matter how you slice it, press-on nails can be a super cute way to level up your look. While removing them can be a bit of a process, it's more than worth taking the time to learn. After all, you never know what other pretty press-ons you may want to try once you've got the hang of it!
With tons of customizable nail styles and nail care accessories to choose from, Red Aspen can help you find the perfect press-ons to showcase your personality, all at a fraction of the salon cost! Learn more about how you can revamp your nail care routine with Red Aspen!
Written by: Nathan Jones
Done reading? Return to home.


