Sandal season is soon upon us - which means it’s that time of the year where showing off your feet becomes the norm. While you’re out feeling confident in the sun in your cute outfits, you should be feeling confident about your feet, too!
Red Aspen has all of the tips and tools to help ensure your feet are sandal ready all summer long. No more hiding your feet at the pool or beach, this summer - we’re saying no to feet insecurity!
Just sit back, relax, and get ready for a step-by-step guide to an at home pedi that will have your feet flip-flop ready all summer long.
Step One: Remove Your Old Nail Polish or Pedi-Dashes
It’s important to start with clean, bare nails before you begin your pedicure process. Start by removing any previous nail polish or Red Aspen Pedi Nail Dashes.

Step Two: Foot Soak & Scrub
In your bathtub, or even a large storage tub, soak your feet in warm water for around 10-minutes. This will allow your skin, cuticles, and nails to soften - making trimming and filing an easier process.
To elevate your foot soak, pour ½ cup of your favorite epsom salt into your bath. Epsom salts help to exfoliate and break down the dead skin cells on your feet, plus the included scents can help add to your rest and relaxation.
After your feet are done soaking, apply a body scrub to your feet, ankles, and lower shins. This will remove any dead skin loosened by the soak and can reduce calluses. Don’t have a foot scrub? No problem! You can easily make a foot scrub at home!
To make your own foot scrub, simply add 1 cup granulated sugar and slowly add olive or coconut oil until you have a grainy, slightly wet consistency. Add a few drops of your favorite essential oils if you desire a scent, and you’re ready to scrub!
After you’re done scrubbing away your dead skin, grab your Red Aspen Compact Nail Cleaning Brush and brush your toenails, making sure to get any dirt that may be stuck underneath!
Once your feet are soaked, scrubbed, and clean - gently pat them dry with a towel.

Step Three: Remove Your Calluses & Rough Skin
If you have any calluses on your feet, the best way to remove them is to file them post-soak with a pumice stone or foot file. Pumice stones and foot files can be found at your local grocery store or your favorite beauty shop.
If using a pumice stone, wet the stone and rub the callused spot with the stone for 2-3 minutes, using light-medium pressure. For a foot file, follow the same process, without wetting the file. The callus may take more than one soak and file session to remove, but complete this process with help to remove the tough skin.
Step Four: Red Aspen Moisturizing Foot Mask
Now to moisturize your feet!
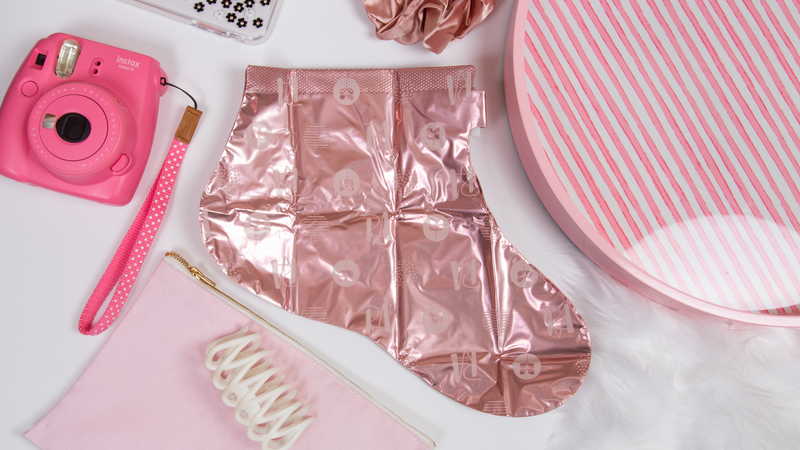
Red Aspen’s PediPrep Mask is made with a blend of Argan, Avocado, Shea, Coconut, Jojoba, and Rosehip to moisturize and nourish hands and cuticles. Included are floral extracts like Camellia, Saffron, and Rose to soothe and soften skin. Lastly, a trio of anti-aging super ingredients, including Hyaluronic Acid, Vitamin E, and Ceramides are included to protect, replenish and maintain healthy-looking skin. (There’s also a fragrance-free version!)

To use the PediPrep Mask, follow the steps below!
- Slide clean, dry feet into the mask, using tab closure to secure.
- Masks can be slippery to walk in - kick up your feet for 10 minutes! Read a book, drink some tea, relax.
- Remove mask and massage remaining lotion onto skin. Make sure all lotion is absorbed before walking!
When massaging in the remaining location, focus not only on your feet, but your lower shins as well. Massages are a great way to get your blood flowing, especially if you spend large amounts of time standing or walking throughout the day. Get that excess blood out of your legs and back to your brain!
If you want a mask that gets down deep and helps get rid of the dead skin you can't, try Red Aspen’s PediExfoliate Mask! This mask offers an extended treatment meant to help you shed any dead skin and reveal the fresh, soft skin that’s hiding underneath.

To use the PediExfoliate Mask, follow the steps below!
- Pour 1 dose of Foot Solution into 1 Foot Mask.
- Place a clean foot into the Foot Mask and secure using sticker closure.
- Massage Foot Solution evenly around foot and in between toes from the outside of the mask.
- Repeat steps 1-3 for the other foot.
- Kick up your feet and relax! Wear the Foot Masks for 60 minutes.
- Once the 60 minutes is up, remove masks and rinse feet with warm water
- The foot peeling process will begin 3-7 days after application and takes up to a couple of weeks to fully peel to reveal your most beautiful skin!
Tips:
- Do NOT use abrasive tools or exfoliators to help speed up peeling.
- We recommend pouring solution into booties and removing booties over a towel, in the bathtub, or shower to prevent any possibilities of staining or spilling.
This mask will cause your feet to peel, so it’s best to plan ahead and use this mask a few weeks before any sandal-necessary plans!
Step Five: Trim & File Your Nails
Now that your nails are soft, it's a perfect time to trim and file them! Take your Red Aspen Pedi Clippers and gently trim your nails to your desired length. Then, take your Red Aspen Nail File and smooth out any sharp edges!

Step Six: Remove & Push Back Your Cuticles
Pushing back your cuticles can help your nails appear longer and help your pedicure last longer.
To remove your cuticles, use Red Aspen’s Cuticle Remover by first applying it to your cuticles.
From there, let the product sit for 30 seconds. After 30 seconds, gently push back your cuticles using the Red Aspen Cuticle Pusher. Once this process is complete, wash your hands with warm, soapy water. Poof! No more cuticles to interfere with your gorgeous pedicure.

Step Seven: Buff Your Nails
Before applying your Red Aspen Pedi Nail Dashes, it’s important to buff your natural nails. Buffed nails have a rougher surface that’s easier for the glue to adhere to. Buff your nails very gently, so they’re just a little rough. Red Aspen’s Nail Buffer Block is a perfect tool to achieve gently buffed nails, without accidentally damaging them in the process.

Step Eight: Apply Your Pedi Nail Dashes!
Pedi Nail Dashes are press on nails for your toes that are easy and quick to apply, non-damaging, and are a fraction of the salon pedicure cost. Application is a breeze with the following steps!

How to Apply:
- Dashes are sized by a number located on the back of each Dash. Select Dash size that best fits each toenail and arrange in order.
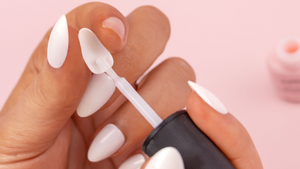
- Apply nail glue to natural toenail and/or back of Dash.
- Align Dash with cuticle and apply at a 45-degree angle.
- Press Dash to natural toenail firmly for 30 seconds.
- Clip or file Nail Dashes to desired length or shape.
TIP: Number goes at the TOP of the toenail, furthest from cuticle.
TIP: Apply Nail Dashes starting with the pinky toe and ending with the big toe.
How to Remove:
- Use a cuticle stick to gently break the seal around the edges of the Nail Dash. Apply cuticle oil around and under the Dash and let the oil soak in to loosen adhesive.
Option 1: Repeat step 1 until Nail Dashes gently pop off.
Option 2: Soak nails for 10 minutes in warm, soapy water mixed with a few drops of cuticle oil.
- Gently lift and apply light pressure to remove Dash, or use Nail Dash Remover tool.
- Remove excess glue with nail file.
TIP: Never force Dash removal. Wait 5+ days or until Nail Dashes begin to pop off before removing.

Celebrate Summer With Red Aspen!
Now you have all the steps to get your feet prepped for the summer! To shop all Red Aspen products and complete your summer look, visit redaspenlove.com.
Written by: Kelly Ann Asker
Done reading? Return to home.


